 listicle
Signs of Shoddy Roof Repair Work: 10 Red Flags to Know
Table of Contents
- 10 Signs of Shoddy Roof Repair Work to Check Right Now
- Common Roofing Installation Mistakes That Cause These Problems
- The 'Settling' Myth vs. Reality: Cosmetic Waviness or Structural Failure?
- Your Roof Repair Inspection Checklist for the Final Walkthrough
- Questions to Ask a Roofing Contractor Before You Pay
- Legal and Insurance Recourse for Shoddy Roof Repair Work
- Step 1: Build the Evidence File Before You Confront Anyone
- Step 2: Get an Independent Written Opinion
- Step 3: Send a Written Demand Letter
- Step 4: File with the Licensing Board and Against the Bond
- Step 5: Understand What Insurance Will and Will Not Cover
- Step 6: Use Code Violations as Leverage
- Step 7: Small Claims Court as a Real Option
- Conclusion
- Frequently Asked Questions
Last Updated: October 2, 2026
10 Signs of Shoddy Roof Repair Work to Check Right Now
Spotting shoddy roof repair work early can save you thousands in water damage and structural repairs. The warning signs fall into ten categories, and most homeowners miss at least three.
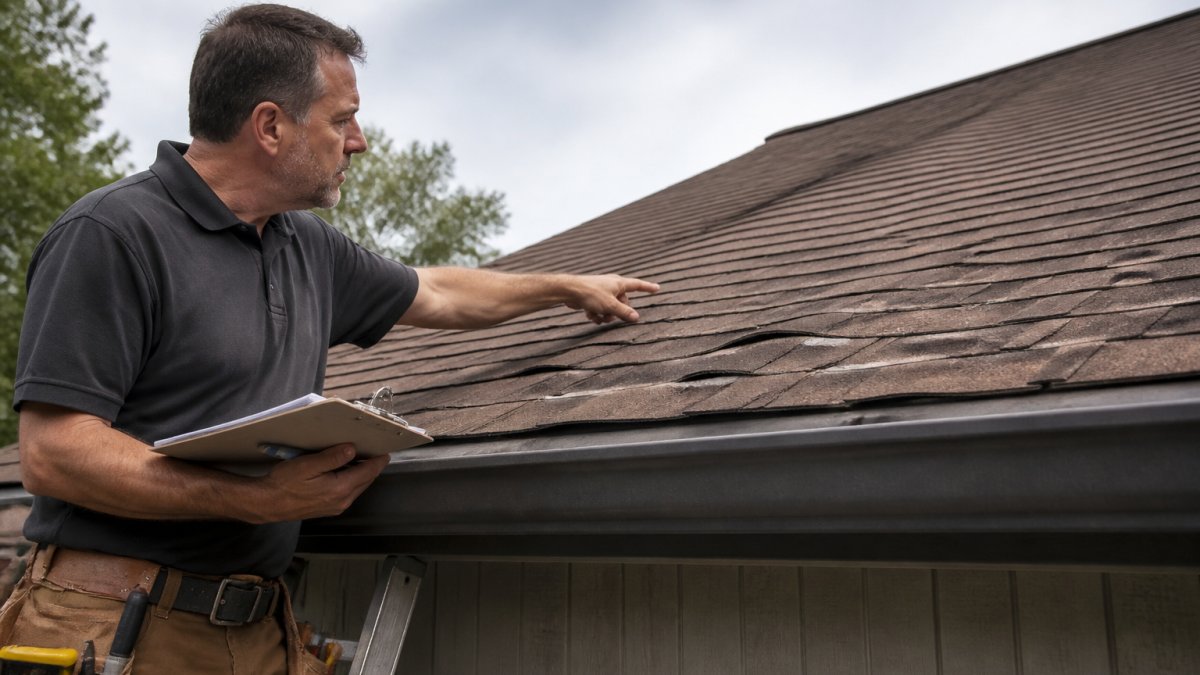
Waviness, Cupping, and Uneven Shingle Appearance
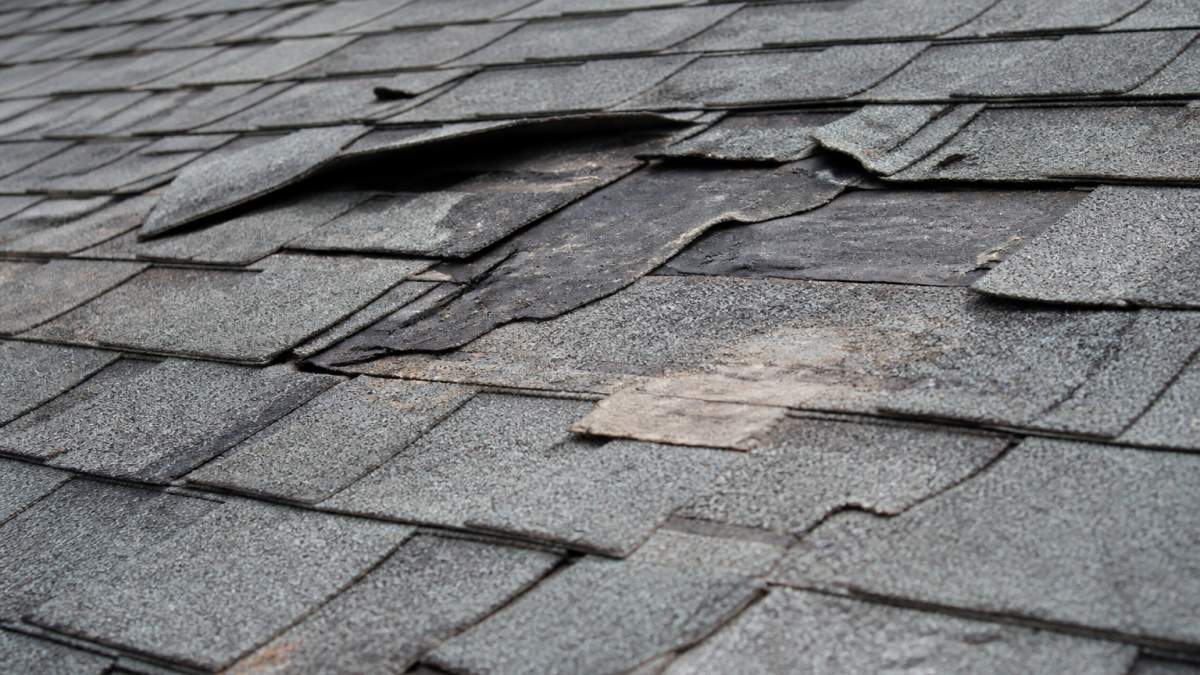
Waviness, cupping, and uneven shingle appearance are the most visible signs of shoddy roof repair work. Shingles should lie flat in straight, parallel rows; ripples, cups, or curls usually mean improper installation or trapped moisture, and cupping often means the decking was never properly secured.
High-Nailing and Other Improper Nailing Techniques
High-nailing is when a roofer drives nails above the manufacturer's designated nail line, leaving the sealing strip unable to bond, one of the most common defects we find. Overdriven and under-driven nails cause the same result: shingles that lift in moderate wind.
Damaged or Reused Flashing and Missing Drip Edge
Flashing protects the roof valley, chimney, and wall intersections from water infiltration. Reused or bent flashing will not seal, and missing drip edge lets water wick under the shingles and rot the fascia. Check the roof edges and every place the roof meets a vertical surface.
Poor Ventilation, Attic Moisture, and Sagging Roof Lines
Poor roof ventilation traps heat and moisture in the attic, warping the decking and causing premature shingle failure. Dark staining under the deck, condensation on rafters, or a sagging roofline means the repair ignored intake and exhaust balance, ridge vents and soffit vents must work together.
Visible Gaps, Exposed Nails, and Mismatched Shingles
Walk the perimeter and look up. Exposed nail heads, gaps between shingle courses, and shingles from a different dye lot all point to rushed work. Nail pops come from wrong nail length or skipped underlayment; mismatched shingles often signal leftover materials from another job.
Common Roofing Installation Mistakes That Cause These Problems
Most defects above trace back to a few installation mistakes: skipped underlayment, high nailing, reused flashing, and ventilation calculated without regard to roof pitch.
The 'Settling' Myth vs. Reality: Cosmetic Waviness or Structural Failure?
"Give it a few heat cycles and it'll lay down." That sentence is the most common deflection a homeowner hears after a bad roof repair, and it is almost always false. Asphalt shingles are manufactured flat and designed to stay flat. Heat bonds the sealing strip to the shingle below, but it does not pull a curled or rippled shingle back into plane.
What Actually Causes a Wavy Roofline
The real causes sort into two buckets.
Cosmetic waviness comes from the substrate or the shingle itself:
- Shingles laid over an uneven or delaminated deck, so the wave telegraphs the board underneath
- Shingles installed in cold weather before the sealant strip activated, then never re-sealed
- Bundles stored flat and stacked too long, leaving a set in the mat
- A single low-quality bundle mixed into an otherwise good run
Structural waviness comes from the framing or the deck:
- A sagging ridge beam or failing rafter, showing as a dip perpendicular to the ridge
- Rotted or softened decking, often from a prior leak the crew covered instead of replaced
- A ridge out of level because the repair pulled the roof out of plane
- Truss uplift, where the bottom chord bows and lifts the ceiling and roof plane above an interior wall
How to Tell Them Apart Before You Call Anyone
You do not need to get on the roof for a first pass. Three tests separate cosmetic from structural in most cases.
- The sightline test. Stand at one corner of the house and sight down the ridge and the eave. A cosmetic wave is local and irregular. A structural sag is a smooth, continuous curve that repeats on both sides of the ridge.
- The press test. From a safe vantage point, press on the wave. Cosmetic waves feel firm and spring back to flat. Structural waves flex, feel spongy, or move the decking under your hand.
- The attic test. Go into the attic with a flashlight during daylight. Look for daylight through the deck, dark water staining on the sheathing underside, a bowed ridge board, or a rafter pulled away from the ridge. Any of those turns a cosmetic question into a structural one.
The Truss Uplift Exception
One pattern that fools homeowners and contractors alike is truss uplift. It shows up as a gap or wave near an interior wall, often in winter, and can look like a failed repair when the roof is behaving normally. The tell: the wave appears and disappears with the season and the attic shows no moisture or rot.
What to Do When the Contractor Blames Settling
Ask for it in writing: a specific, dated statement of what will be corrected, by whom, and by what date. A vague promise that "it'll flatten out" is not. Then get a second opinion from a licensed roofer or home inspector before paying the final invoice.
Your Roof Repair Inspection Checklist for the Final Walkthrough
Use this checklist before you sign off on any roofing project. Print it and walk the property with the crew lead.
- Shingle rows are straight and parallel from every angle
- No exposed nail heads on any shingle course
- Flashing at valleys, chimneys, and walls is new and properly sealed
- Drip edge is installed along all eaves and rakes
- Ridge vent and soffit vents are unobstructed
- No debris, nails, or wrappers left in gutters or landscaping
- Attic shows no daylight through the roof deck
- All penetrations (vents, pipes, skylights) have fresh boots or seals
- Written workmanship warranty is in hand
- Final invoice matches the signed estimate
Questions to Ask a Roofing Contractor Before You Pay
Ask these before handing over the final payment. The answers tell you more than any online review.
- Will you put the workmanship warranty in writing, and how long does it last?
- Did you replace the underlayment, or did you install over the old layer?
- What was the condition of the roof decking, and did you photograph it?
- Did you install new flashing at every penetration, or reuse the old material?
- How did you calculate attic ventilation for this roof pitch?
- Who is the manufacturer, and does the installation meet their specifications?
- Can I see the permit and the final inspection sign-off?
Legal and Insurance Recourse for Shoddy Roof Repair Work
Most articles stop at "call a pro." That advice is useless once the crew has cashed your check and stopped answering the phone. What follows is the sequence that works, from the first photo to the last filing deadline.
Step 1: Build the Evidence File Before You Confront Anyone
Every later claim depends on what you can prove. Start one folder, physical and digital, with these in it:
- Dated photos and video of every defect, from multiple angles and distances, with a wide shot showing it in context on the roof
- The signed contract, estimate, and every change order, including texts and emails where scope was discussed
- Proof of payment, canceled checks, bank statements, credit card statements
- Permit and inspection records, usually available from your local building department's online portal
- A written timeline of what was promised, when, and what actually happened
- Warranty documents the contractor provided, plus the manufacturer's written installation specifications for the shingle used
Step 2: Get an Independent Written Opinion
A demand letter is far stronger backed by a second licensed roofer or home inspector who puts the defects in writing. Ask for a report identifying each defect, citing the manufacturer's installation specification or building code section it violates, and estimating the cost to correct.
Step 3: Send a Written Demand Letter
Send a demand letter by certified mail with return receipt, and keep a copy. It should state the defects, reference the contract and independent report, set a reasonable deadline to correct the work, and state what happens if the deadline passes. Most state consumer protection statutes treat a clear written demand as a prerequisite to further claims, so do not skip it.
Step 4: File with the Licensing Board and Against the Bond
If the contractor is licensed, file a complaint with your state's contractor licensing authority. Most states require roofing contractors to carry a surety bond, and a valid claim against it can fund remediation when the contractor will not. Filing windows are short, often months from the date of the work, not discovery, so check your state's licensing board for the exact deadline.
Step 5: Understand What Insurance Will and Will Not Cover
A homeowners policy covers sudden, accidental damage, windstorm, fallen limb, hail, not poor workmanship, which most policies exclude explicitly. The exception that matters is resulting damage: if a shoddy repair let water into the wall and ruined drywall, insulation, or flooring, many policies cover that damage even though they exclude the faulty work itself.
Step 6: Use Code Violations as Leverage
If the original installation violated the building code, missing ice and water shield in valleys, no drip edge, improper nailing, inadequate ventilation, that strengthens every other claim: the licensing board complaint, the bond claim, and a civil claim for breach of contract or negligence. Pull the code sections your jurisdiction adopted and cite them by number in your demand letter.
Step 7: Small Claims Court as a Real Option
For disputes below your state's small claims limit, small claims court is often the fastest, cheapest path. You do not need a lawyer, filing fees are low, and the evidence file from Step 1 is exactly what the judge wants to see, bring the contract, photos, independent report, and demand letter.
Conclusion
Shoddy roof repair rarely announces itself. It hides in wavy shingle rows, high-nailed fasteners, and flashing that should have been replaced. The best defense is a documented walkthrough, a written workmanship warranty, and a contractor who answers hard questions without flinching.
Frequently Asked Questions
Can you sue a roofer for poor workmanship?
Yes, you can pursue legal action for shoddy roof repair work. Most states allow claims for breach of contract, breach of warranty, or negligence, and many consumer protection laws add penalties for deceptive practices. Your first step is documenting everything: photos, the written contract, and any workmanship warranty. Send a written demand letter giving the contractor a chance to fix the issues. If they refuse, small claims court handles smaller disputes, while larger damages may need a civil suit. Consult a local attorney to confirm deadlines and the best path forward.
How do I document poor roofing work for an insurance claim?
Start by photographing every defect from multiple angles, including wide shots that show the roof section and close-ups of exposed nails, damaged flashing, or wavy shingles. Keep a dated log of when you noticed each problem and any communication with the contractor. Get a written inspection report from a licensed roofing professional who can tie the defects to installation errors rather than wear and tear. Save your contract, receipts, and warranty documents. Submit this package to your insurer and ask for a re-inspection if the first adjuster missed the workmanship issues.
What are the long-term consequences of shoddy roof repairs?
Poor repairs often lead to water infiltration that rots roof decking, insulation, and drywall, sometimes within a single rainy season. Trapped attic moisture feeds mold and shortens the life of your HVAC equipment. High-nailing and missing drip edge let wind lift shingles, turning a small defect into a full replacement years ahead of schedule. Structurally, sagging roof lines can signal damaged framing that costs far more to fix than the original repair. Catching the signs early protects both your home's structure and your wallet.
What is the 25 rule in roofing?
The 25 rule is a common industry guideline stating that if more than 25 percent of a roof's shingles are damaged or failing, replacement makes more sense than repeated repairs. The exact threshold varies by local building codes and manufacturer specifications, so check your area's requirements. For shoddy repair work, the rule helps you decide whether to keep patching or start over. If a contractor keeps recommending small fixes on a roof that exceeds that threshold, get a second opinion before paying for another short-term patch.