 how-to
Residential Roof Inspection Checklist for Homeowners
Last Updated: October 24, 2026
Quick Summary
A roof inspection checklist helps you spot damage before small problems become expensive repairs by documenting missing shingles, flashing issues, water stains, and other defects. Regular inspections catch these issues early, support insurance claims, and tell you your roof's real condition before water reaches your living spaces.
- Schedule inspections in spring and fall, plus within 48 hours after severe storms.
- Use binoculars, walk the perimeter, and check the attic to assess your roof safely from the ground without climbing.
- Rank every finding into Tier 1 (call now), Tier 2 (schedule within weeks), or Tier 3 (routine maintenance).
- Missing shingles, sagging rooflines, and active drips are Tier 1 findings requiring immediate professional assessment.
- Keep a dated photo log with location, severity tier, and follow-up actions to support insurance claims and track changes over time.
Table of Contents
- Why Regular Roof Inspections Matter for Homeowners
- How to Inspect Your Roof Safely from the Ground
- Annual Roof Inspection Checklist: What to Look For
- Roof Inspection Checklist for Shingles and Common Defects
- Flashing, Penetrations, and Drainage Systems
- Interior and Attic Checks Linked to Roof Damage
- The Professional Roof Inspection Process
- Frequently Asked Questions
Why Regular Roof Inspections Matter for Homeowners
A roof inspection checklist helps you spot damage before small problems become expensive repairs.
Regular inspections catch these issues early and help with insurance claims.
Most homeowners wait until they see a leak inside, by which point damage extends beyond what's visible from below.
How to Inspect Your Roof Safely from the Ground
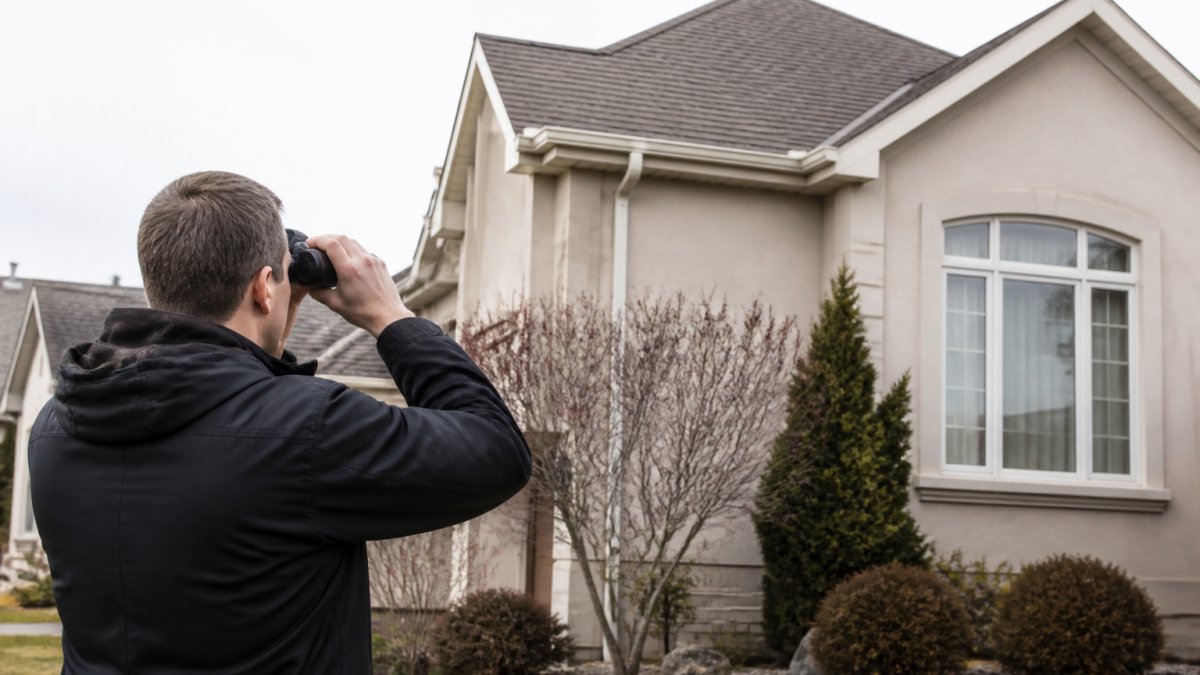
The safest roof inspection starts on the ground. Use binoculars, walk the perimeter, and check the attic to assess most of your roof's condition without climbing, eliminating fall risk.
What You'll Need Before You Start
Gather these items before you begin your residential roof inspection checklist:
- Binoculars (10x magnification works well)
- Notepad and pen or phone to document findings
- Flashlight for attic inspection
Ground-Level Inspection Steps
Walk the full perimeter of your home.
Step 1: Use binoculars to scan the roofline. A sagging roofline suggests structural issues or water damage underneath.
Step 3: Inspect flashing and penetrations. Flashing is the metal trim around chimneys, vents, and skylights.
Step 4: Check gutters and downspouts. Look for debris, sagging, or separation from the fascia.
Annual Roof Inspection Checklist: What to Look For
Use this checklist every spring, every fall, and within 48 hours after any severe storm. The goal is not to diagnose the roof yourself, it is to record what you see, rank it by urgency, and decide whether a professional needs to look.
The Checklist, With Urgency Tiers
Rank every finding into one of three tiers. Tier 1 means stop and call a professional now. Tier 2 means schedule an inspection within a few weeks. Tier 3 means add it to routine maintenance.
| Finding | What It Usually Means | Urgency Tier |
|---|---|---|
| Missing shingles or exposed decking | Direct water entry point; decking begins to rot once wet | Tier 1, call now |
| Sagging roofline or dips in the ridge | Decking or structural support has weakened, often from long-term moisture | Tier 1, call now |
| Active drip or daylight visible in the attic | Open pathway from roof to interior | Tier 1, call now |
| Flashing gaps, lifted flashing, or rusted fasteners | Leak hotspot at chimneys, vents, and skylights | Tier 1 if gap is open; Tier 2 if sealant is merely cracked |
| Buckling or waviness across multiple shingles | Moisture under shingles has caused decking movement | Tier 2, schedule inspection |
| Curled or clawing shingles on one or more slopes | Age-related wear; slope is approaching end of life | Tier 2, schedule inspection |
| Heavy granule accumulation in gutters | Accelerated shingle aging across the roof | Tier 2, schedule inspection |
| Cracked shingles scattered across the roof | Water penetration risk at each crack | Tier 2, schedule inspection |
| Moss, algae, or lichen on shaded slopes | Moisture retention and gradual surface decay | Tier 3, clean and monitor |
| Gutter debris, sagging gutters, or downspouts discharging at the foundation | Water backup at the roof edge and foundation stress | Tier 3, clean and re-secure |
| Minor sealant cracking at one penetration | Normal wear; reseal before it opens | Tier 3, reseal |
Build a Dated Photo Log
A checklist without a record is just a memory. For each finding, log:
- Date of the inspection
- Location on the roof (for example, "north slope, 3 ft left of chimney")
- Severity tier (1, 2, or 3)
Shooting the same angles each season is the most useful habit here. Side-by-side photos show whether a crack is spreading, a stain is growing, or a repair held. That dated record also supports insurance discussions, adjusters respond to a timeline, not a snapshot.
The Ground-vs-Professional Decision
Before you climb anything, run this sequence:
- Can you see the finding from the ground with binoculars? If yes, log and rank it. If no, do not climb, note the area as "not visible from ground" and let a professional assess it.
- Is the finding Tier 1? If yes, stop and call a roofer. Do not attempt a temporary fix.
- Is the finding Tier 2 and reachable from a ladder without stepping onto the roof? You may photograph it from the ladder, but do not walk the roof.
- Is the finding Tier 3? Add it to your maintenance list and re-check it at the next seasonal inspection.
Check this list every spring and after storms, and write down what you find. Over time, Tier 2 findings turning into Tier 1 findings tell you when repair or replacement is the better investment.
Roof Inspection Checklist for Shingles and Common Defects
Shingles are your roof's first defense against weather. Understanding what to look for helps you catch damage early.
Missing, Cracked, and Curled Shingles
Missing shingles expose the roof decking to rain and wind, even one creates a water entry point.
Curled shingles indicate age and wear. As shingles lose flexibility, they curl at the edges, faster in hot climates and on south-facing slopes. Once shingles curl, replacement is usually near.
Look for these patterns:
- Single missing shingles scattered across the roof
- Cracks running perpendicular to the shingle grain
- Corners or edges lifting away from adjacent shingles
Granule Loss and Exposed Roof Decking
Asphalt shingles are coated with granules that protect the asphalt underneath from UV damage.
Exposed roof decking (the wood underneath the shingles) appears as light-colored areas where shingles have worn through.
Check gutters for granule accumulation. A small amount is normal. Large quantities suggest accelerated aging across multiple shingles.
Buckling and Sagging
Buckling appears as waves or ridges across shingles, caused by moisture under the shingles making the decking expand and contract. It indicates water infiltration and decking damage.
Sagging is visible when you look at the roofline from a distance. It means the decking or structural supports have weakened, usually from water damage, and requires immediate professional assessment.
Flashing, Penetrations, and Drainage Systems
Flashing and roof penetrations are leak hotspots. They're also the most repairable issues if caught early.
Inspecting Flashing and Sealants
Flashing is metal (usually aluminum or steel) that directs water away from roof penetrations, installed under shingles at edges and around obstacles.
Look for:
- Rust stains on flashing
- Gaps between flashing and shingles
- Dried, cracked, or missing sealant
Sealant around flashing should be flexible and intact. If it's cracked or missing, water penetrates underneath. Resealing is a simple fix if caught early.
Roof Penetrations: Chimneys, Vents, and Skylights
Chimneys, vents, and skylights create openings in the roof. Each requires flashing to prevent leaks. These areas experience more stress than flat roof sections because water flows around the penetration.
Inspect the flashing around each penetration:
- Chimney flashing at the base and sides
- Vent pipe collars and the sealant around them
- Skylight frames and their perimeter flashing
Water stains on siding below these penetrations indicate active leaks. Dark streaks or discoloration around the penetration itself shows moisture problems.
Gutters, Downspouts, and Debris
Gutters and downspouts manage water runoff. Clogged gutters trap water against the roof edge, causing decay and leaks.
Check gutters for:
- Leaves, twigs, and sediment buildup
- Sagging sections or separation from the fascia
- Rust holes or corrosion
Clean gutters at least twice yearly. More frequent cleaning is needed if you have trees overhead. Proper drainage protects both the roof and the foundation.
Interior and Attic Checks Linked to Roof Damage
Interior signs often appear before exterior damage is obvious. The trick is to read each interior clue as a pointer to a specific exterior defect, so you know where to look next and what to tell a roofer. This section pairs each interior observation with the exterior cause it usually points to.
Water Stains: Read the Shape and Location
Water stains on the attic ceiling or rafters appear as dark patches, rings, or tide lines. The shape tells you something about the source:
- A ring or tide line usually means intermittent moisture, water enters during storms and dries between events. The outer edge marks the furthest spread.
- A solid dark patch suggests ongoing moisture and possible rot in the decking above it.
- A stain directly below a chimney, vent, or skylight points to flashing at that penetration.
Note the location and compare it to exterior features. A stain below the chimney is a flashing conversation; a stain mid-slope is a shingle conversation.
Damp Insulation and Musty Odors
Insulation that feels damp, clumps together, or smells musty is holding moisture. Wet insulation loses its thermal value and creates a mold-friendly environment.
Check whether the damp area sits under a known exterior defect (a missing shingle, a flashing gap, a cracked vent collar).
Soft Spots, Discoloration, and Mold on the Decking
From inside the attic, look up at the roof decking. Probe any area that looks discolored with a screwdriver handle, not a sharp tool. Soft or spongy decking indicates rot from prolonged moisture exposure. Black or green discoloration on the wood suggests mold or long-term dampness.
Daylight and Active Drips
Daylight visible through the roof deck is an open pathway. So is any active drip, even a slow one. Both are Tier 1 findings, call a professional rather than attempting a sealant fix from inside. A drip that only appears during rain is still an active leak; the dry periods between storms are when the damage spreads.
Ventilation: The Often-Missed Half of the Check
Attic vents should be clear and unobstructed. Blocked soffit or ridge vents trap heat and moisture, which accelerates shingle deterioration from underneath and promotes mold. Look for insulation pushed against the soffit vents, bird nests, or debris blocking the ridge vent. A well-vented attic is part of roof health, not a separate topic.
Room-by-Room Interior Sweep
Walk the top floor of the house with a flashlight and check:
- Ceilings near exterior walls and under roof slopes for stains, bubbling paint, or sagging drywall
- Walls at the top corners where the ceiling meets the exterior wall
- Windows on the top floor for water tracks or condensation patterns that appear only during storms
Record each finding with a photo and a note of which exterior feature sits above it. That mapping is the bridge between the interior check and the exterior checklist.
The Professional Roof Inspection Process
Some findings require professional assessment. Knowing when to call a roofer saves time and prevents costly damage.
When to Hire a Professional Inspector
Hire a professional roofer if you find:
- Missing shingles or exposed decking
- Sagging roofline or structural concerns
- Active leaks or water stains in the attic
You should also hire a professional before buying a home. A pre-purchase inspection protects your investment by identifying problems before you close. Insurance claims also benefit from professional documentation. At Leitch Roofing, we help homeowners navigate insurance claims by providing detailed inspection reports that document damage scope and location.
What to Expect from a Professional Inspection
A professional roofer climbs onto the roof and conducts a thorough assessment.
The roofer will:
- Walk the entire roof surface
- Test flashing for leaks and separation
- Check attic ventilation and insulation condition
Professional inspections take 1-2 hours depending on roof size and complexity. You'll receive a detailed report showing problem areas and recommended actions. This documentation is essential for insurance claims and helps you prioritize repairs.
NRCA roofing inspection guidelines recommend professional inspection every 3-5 years or after major storms. This schedule prevents small issues from becoming emergencies.
Protecting your roof starts with understanding its condition. When you find concerning signs, residential roofing services provide professional evaluation and repair options.
At Leitch Roofing, we've helped homeowners across the region document roof damage for insurance claims and plan timely repairs. Whether you need a professional assessment, storm damage evaluation, or help navigating your insurance claim, we're here to guide you. Request a free estimate to discuss your roof's condition with our team, or check whether we service your area to schedule an inspection.
Frequently Asked Questions
How often should a homeowner inspect their residential roof?
Most homeowners should conduct a visual inspection at least once per year, ideally in spring or fall. After severe weather like storms or hail, inspect sooner to catch damage early. If your roof is over 15 years old, consider semi-annual inspections. Annual inspections help identify small issues before they become costly repairs and protect your home from water damage and deterioration.
What are the signs that a roof needs repair?
Watch for missing, cracked, or curled shingles; granule loss (dark specks in gutters); sagging areas; damaged flashing around chimneys and vents; and water stains on ceilings or attic insulation. Storm damage, moss or algae growth, and loose or buckling shingles are also warning signs. If you spot any of these during your roof inspection checklist review, contact a professional to assess whether repair or replacement is needed.
Can homeowners safely inspect a roof from the ground?
Yes, homeowners can perform a safe ground-level inspection using binoculars, a ladder against the house (not on the roof), or by viewing from windows and attic spaces. This approach eliminates fall risk while still identifying visible damage to shingles, flashing, gutters, and the roofline. For detailed inspection of roof valleys, ridges, and areas you cannot see clearly, or if you suspect significant damage, hire a professional roof inspector.
What should I do if my insurance adjuster says my roof damage is just wear and tear?
Request a detailed written explanation of the adjuster's findings. Document your own observations with photographs and notes from your roof inspection checklist. If you believe the damage is storm-related rather than normal aging, ask a professional roofer to review the damage and provide their assessment. Many roofing professionals offer free inspections and can help you understand whether findings support an insurance claim or indicate maintenance issues.