 how-to
Commercial Roof Drainage System Design: Practical Steps
Quick Summary
A commercial roof drainage system uses drains, outlets, slopes, and overflow paths to move rain off the roof and prevent ponding water. Good design starts with rainfall data, roof area, and structural capacity, then sets positive slope toward each drain. Overflow outlets must sit higher than primary drains to work during blockages.
- Ponding water lasting 48 hours or more adds weight and speeds membrane aging.
- Gather local design storm rainfall data, such as NOAA Atlas 14, before sizing drains.
- Overflow outlets must sit higher than primary drains to activate during a blockage.
- Use tapered insulation to create positive slope without changing the structural deck.
- Clear drains and scuppers monthly and check for standing water within 48 hours after storms.
Table of Contents
- Why Drainage Design Decides How Long a Commercial Roof Lasts
- Types of Roof Drainage Systems and When Each Fits
- Gathering Inputs: Rainfall Data, Roof Area and Structure
- Building a Flat Roof Drainage Plan Step by Step
- Roof Drain Installation Detail Checkpoints
- Code Checks, Emergency Drainage and Coordinating With Structural Design
- Commercial Roof Drain Maintenance Schedule and Inspection Routine
- Scheduling Your Drainage Review With Leitch Roofing
- Frequently Asked Questions
Commercial Roof Drainage System Design: Practical Steps
Last Updated: November 2, 2026
Why Drainage Design Decides How Long a Commercial Roof Lasts
Water is the biggest enemy of a commercial roof. A roof that was installed correctly can still fail early when water sits in the wrong place for too long. A commercial roof drainage system is the set of drains, outlets, slopes, and overflow paths that move rain off the roof. Good design keeps water moving. Poor design lets it pool, soak in, and wear down the membrane.
Ponding water is the main problem. A puddle that stays on a roof for 48 hours or more adds weight, speeds up membrane aging, and invites leaks at seams and penetrations.
Design mistakes are hard to fix later. You can patch a leak, but you cannot easily add slope or move a drain once the roof is built. That is why the planning steps below matter so much.
Types of Roof Drainage Systems and When Each Fits
Commercial buildings use a few main drainage approaches. Each one suits different roof shapes, climates, and building types.
- Internal drains: Drains run through the roof and connect to pipes inside the building.
- Scuppers: Openings in the parapet wall let water exit the roof edge.
- Gutters and downspouts: Exterior channels carry water down the building face.
- Overflow drains: Secondary outlets activate when primary drains clog.
Most roofs use a combination. Choosing the right mix depends on the roof area, the building height, and local code requirements.
Gravity drainage with internal drains
Gravity drainage is the most common system for flat commercial roofs. Water flows across a sloped surface into drains, then down through vertical leaders and horizontal pipes. It works well when the building has room for piping and the roof has enough slope.
Gravity systems are simple to maintain. The downside is that they need proper pitch in the pipes and careful sizing. Undersized pipes back up fast during heavy storms.
Scuppers, overflow drains and gutters
Scuppers and gutters suit buildings where interior piping is hard to run. They also serve as overflow paths. A roof with internal drains often gets scuppers set slightly higher as a backup. If the main drains clog, water spills out the scuppers instead of rising over the membrane.
Watch out: overflow outlets set at the same height as primary drains do nothing during a blockage. They must sit higher to be useful.
Gathering Inputs: Rainfall Data, Roof Area and Structure
Good design starts with good numbers. Before you pick drain sizes, collect these inputs:
- Local rainfall intensity: Use the design storm data for your area, such as the National Oceanic and Atmospheric Administration (NOAA) Atlas 14, which is available from NOAA (PF Data Server-PFDS/HDSC/OWP).
- Roof area: Measure the total square footage that drains to each outlet.
- Structural capacity: Confirm the deck can handle the weight of water if ponding occurs.
- Building height and layout: Note parapets, mechanical units, and walls that could trap water.
Rainfall numbers drive pipe and drain sizing. A roof in a region with heavy downpours needs more drain capacity than one in a dry climate. Always confirm figures with your local building department, since many jurisdictions set their own design storm requirements.
Building a Flat Roof Drainage Plan Step by Step
Use this simple sequence when you plan a new drainage layout:
- Divide the roof into drainage areas, one per outlet.
- Set the slope for each area toward its outlet.
- Calculate the flow each outlet must handle.
- Choose drain and pipe sizes that meet that flow.
- Place overflow outlets above the primary drains.
- Mark all penetrations and check for conflicts with equipment.
Work through the plan on paper before anyone orders materials. Mistakes found on a drawing cost far less than mistakes found on the roof.
Setting roof slope and positive drainage
Positive drainage means the roof surface always slopes toward an outlet. Designers typically set slope to move water reliably toward each outlet, and the target depends on the project and applicable code. Tapered insulation creates this pitch without changing the structural deck.
Watch out: flat decks that look level often hold water in low spots. Check slope with a laser level during construction, not just on the drawings.
Sizing drains, leaders and overflow outlets
Each drain must carry the water from its drainage area during a design storm. Pipe diameter, drain capacity, and leader size all depend on the flow rate. Use the sizing tables in your local plumbing code as your starting point.
Overflow outlets usually match the primary drain capacity. Size them the same way, and set their inlet height so water reaches them before it threatens the building.
Roof Drain Installation Detail Checkpoints
Installation details decide whether the design performs. Check these items on site:

- Drain bowl sits at the lowest point of its drainage area.
- Membrane flashing extends properly up the drain collar.
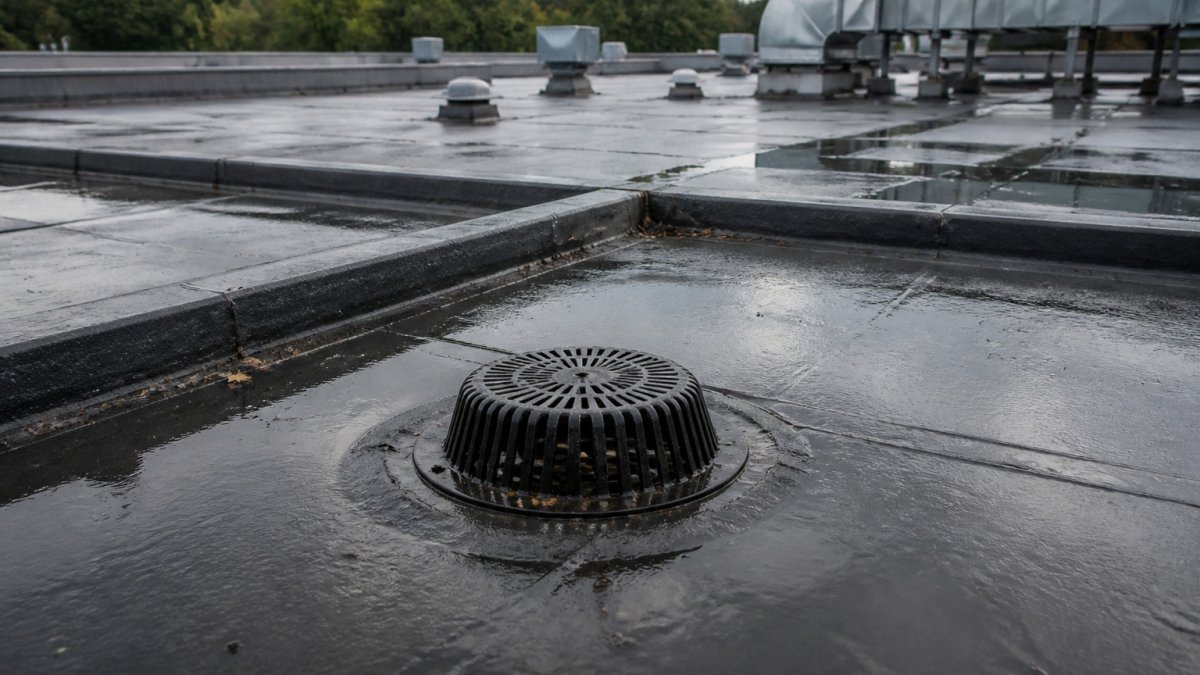
- Strainers or domes are installed and not blocked by debris.
- Leader pipes are supported, sealed, and pitched correctly.
- Overflow scuppers are set at the specified height.
A crew member should inspect each drain before the membrane covers it. Once the roof is sealed, fixing a bad drain means tearing into finished work.
Installation details decide whether the design performs, so check these items on site.
| Checkpoint | What to verify | Why it matters |
|---|---|---|
| Drain location | Bowl sits at lowest point of its area | Water reaches the outlet |
| Flashing | Membrane extends up the drain collar | Prevents leaks at the drain |
| Strainers or domes | Installed and free of debris | Keeps the drain flowing |
| Leader pipes | Supported, sealed and pitched | Carries water away reliably |
| Overflow scuppers | Set at the specified height | Works when primary drains clog |
Code Checks, Emergency Drainage and Coordinating With Structural Design
This is the section most design guides skip, and it is where projects get red-tagged or, worse, fail in service. Treat it as a verification phase with three workstreams: confirm the code basis, prove the emergency path works, and lock in structural and roofing coordination before construction.
Code verification checklist
Codes set minimums, and local amendments change them. Work through this list with your local building department before finalizing the design:
- Adopted model codes and amendments: Confirm which model codes the jurisdiction enforces and pull the local amendments that affect roof drainage, overflow, and leader sizing.
- Design storm criteria: Confirm the required return period and duration and the rainfall source the authority accepts.
- Primary and secondary drainage requirements: Confirm the code's requirements for secondary (overflow) drainage, including whether it must be independent of the primary system and how its capacity is specified.
- Materials and leader standards: Confirm referenced standards for drain bodies, leaders, and strainers, and any local product approvals.
- Inspection and permit sequence: Confirm when the drainage rough-in and overflow path must be inspected relative to membrane installation, so nothing gets covered before sign-off.
Document each answer in the project file. A verbal confirmation from a plans examiner is not a substitute for the written requirement.
Emergency drainage and failure scenarios
Emergency drainage exists for one reason: the primary system will eventually be partially blocked by debris, ice, or a collapsed strainer. Design the overflow so that when the primary clogs, water rises to the secondary inlet and exits before it reaches a depth that threatens the structure or the membrane seams.
A useful check is to walk through the failure scenario on paper: assume the largest primary drain on the roof is fully blocked during the design storm. Trace where that tributary's water goes. If it ponds until it reaches an overflow inlet, confirm the ponding depth and the time to drain are acceptable to the structural engineer.
Watch out: overflow outlets that discharge where no one can see them hide the fact that the primary is clogged. Where practical, route overflow discharge to a visible location so building staff notice the activation and clear the primary.
Coordination with structural and roofing design
Drainage decisions ripple into the structure and the roof assembly, so coordinate early and in writing:
- Structural ponding loads: Give the structural engineer the overflow inlet elevations and the assumed ponding depth so the deck is checked for that load, not just the design live load.
- Roof membrane and penetration details: Confirm with the roofing designer how drain bodies, scuppers, and overflow outlets are flashed and how insulation and tapered crickets fit around them. Drain locations set after the membrane layout is fixed force field-cut details that are harder to seal.
- Tapered insulation and slope: Verify that the tapered insulation plan actually produces positive slope to each drain and that crickets route water away from equipment curbs and valleys where it could pond.
- Sequence of trades: Agree on when drains are set, when the membrane is flashed, and when inspections occur, so the plumbing and roofing crews are not working against each other.
A short coordination meeting with the architect, structural engineer, plumbing designer, and roofing contractor before construction resolves most of these conflicts while they are still lines on a drawing.
Commercial Roof Drain Maintenance Schedule and Inspection Routine
Even the best design needs upkeep. Leaves, twigs, roof granules, and debris block drains and cause backups. A simple routine prevents most failures:
- Monthly: Walk the roof and clear debris from drains, strainers, and scuppers.
- After storms: Check for standing water within 48 hours.
- Twice a year: Inspect flashing, leader connections, and overflow outlets.
- Yearly: Have a qualified roofer review the full system and record findings.
Keep a simple log of each inspection. Patterns in the log often reveal problems, such as a drain that clogs every fall.
Scheduling Your Drainage Review With Leitch Roofing
If your commercial roof has ponding, slow drains, or a planned replacement, a drainage review is the best place to start. Our team can check slope, drain placement, and overflow paths on your existing roof, and we can help plan drainage for new construction. You can explore our commercial roofing services for TPO, metal, and flat roof options, then contact us to talk through your building. To get started right away, request a free estimate and we will follow up promptly. If you are not sure we cover your site, check our service areas for coverage across West Tennessee.
Frequently Asked Questions
How do you design a commercial roof drainage system?
Start with rainfall intensity for your location, then calculate the roof area each drain must serve. Confirm the roof slope or tapered insulation provides positive drainage toward each drain, then size drains, leaders and overflow outlets to the calculated flow rate. Check the local building code, because requirements vary by jurisdiction. Finally, verify the layout with the structural engineer and roofing contractor before installation, and document the design for inspection.
How often should commercial roof drains be inspected and cleaned?
Commercial roof drains should be inspected regularly, including after major storms. Remove leaves, debris and roof-cover granules from strainers and drain domes, and confirm water clears within a reasonable time after rain. Check overflow scuppers and gutters at the same visits. Heavy tree cover or areas with frequent storms may require more frequent cleaning.
What causes standing water on a commercial roof?
Standing water, or ponding, usually results from insufficient slope, sagging structure, clogged drains, or drains placed too far from low points. Debris and roof-cover granules are the most common blockages. Ponding water adds weight and accelerates membrane wear, so identifying low spots during design or inspection matters. Regular checks after storms help catch ponding before it causes leaks.
What should a commercial roof drainage plan include?
A complete plan includes a roof plan showing drain locations and drainage areas, slope or tapered insulation details, rainfall design basis, drain and pipe sizes, overflow provisions, and material specifications. It should also list applicable code references, installation details for each drain type, and a maintenance schedule. Including these items gives contractors, inspectors and building owners a single reference for construction and future service.