 how-to
Emergency Roof Tarping for Storm Damage: What to Do First
Last Updated: October 29, 2026
Quick Summary
Emergency roof tarping means covering the damaged roof with a heavy-duty waterproof tarp to stop rain from getting inside before permanent repairs begin. The tarp is not the fix; it buys you time. Install it only in safe weather, never work alone, and photograph all damage before you cover it.
- Tarp when shingles are missing, a hole is visible, or leaks are active.
- Stay off wet, icy, steep, or sagging roofs and call a professional.
- Add at least 4 feet of tarp overhang on every side of the damage.
- Fasten through wooden boards, not grommets, which tear out in wind.
- Most tarps hold up for weeks, not months, so inspect after every storm.
Table of Contents
- When Storm Damage Means You Need Emergency Roof Tarping
- Temporary Roof Tarp Installation: Step-by-Step
- Choosing the Right Tarp Size and Fastening Method
- How Long Does Roof Tarping Last?
- Roof Damage Insurance Claim Documentation That Gets Results
- What Roof Tarp Cost Looks Like and What Affects It
- Get a Free Estimate Before the Next Storm Hits
- Frequently Asked Questions
When Storm Damage Means You Need Emergency Roof Tarping
Emergency roof tarping for storm damage is the act of covering a damaged roof with a heavy-duty waterproof tarp to stop rain from getting inside before permanent repairs can begin.
Here is the part most guides get wrong. The roof itself is rarely the biggest loss after a storm.
So the question is not whether a tarp looks good. It is whether you can get one up safely and fast.
Signs Your Roof Needs a Tarp Right Now
Not every storm calls for a tarp. These do:
- Missing shingles that leave bare decking exposed to rain
- A visible hole or roof opening from a fallen limb or flying debris
- Active leaks with water staining ceilings or running down walls
Wind damage often hides. A shingle can lift, break its seal, and drop back into place, looking fine from the ground. That is why a roof inspection after any major storm matters more than a quick glance from the driveway.
When to Stay Off the Roof
This is the rule we repeat most: if you are not confident on a ladder, stay down. A wet roof after a storm is a fall hazard, and falls happen fast.
Do not climb up when:
- The roof is still wet, icy, or covered in debris
- Winds are still gusting
- You see sagging decking or a bowed roofline
A damaged roof is not worth a broken back. When in doubt, call a professional roofer and let them take the risk with the right gear.
Temporary Roof Tarp Installation: Step-by-Step
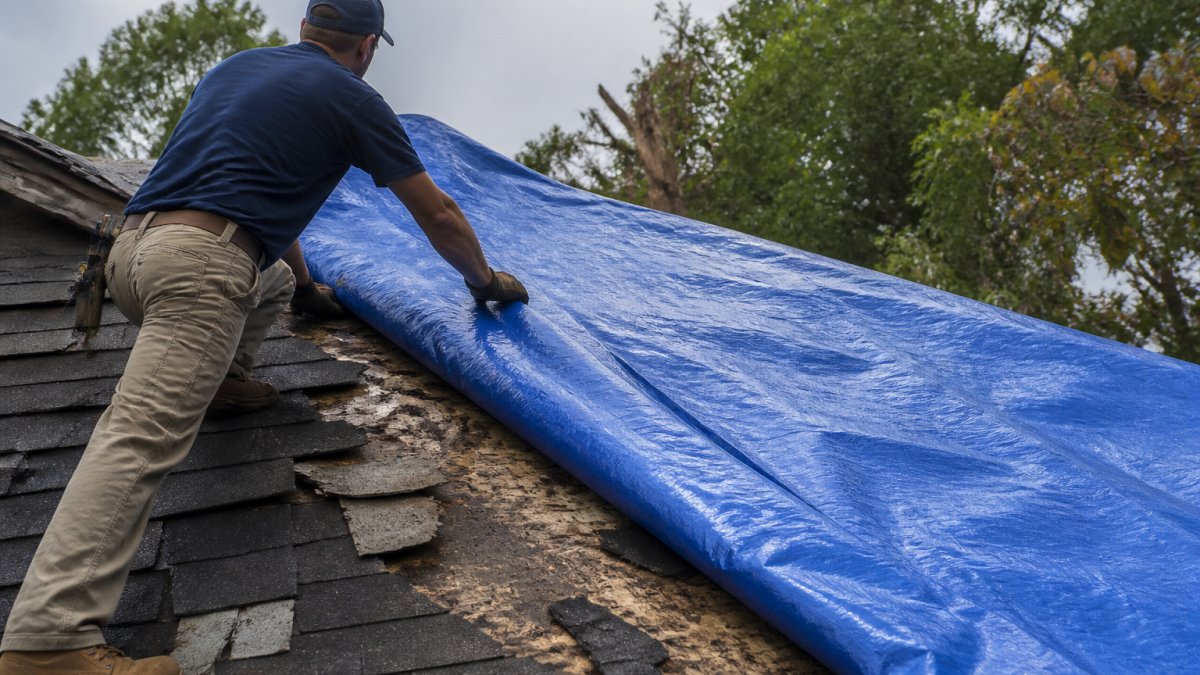
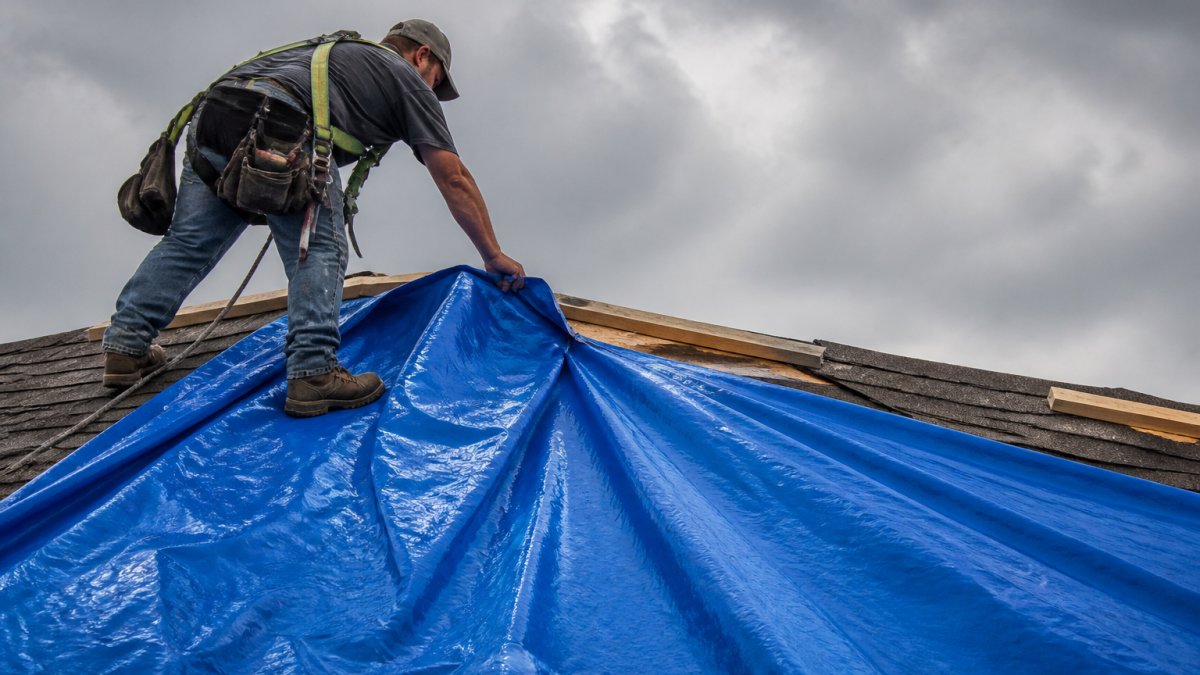
Temporary roof tarp installation follows a simple sequence: clear the area, measure and cut the tarp, drape it over the damage, and fasten it above the ridge so water runs off.
- Check the forecast. You want a dry window with low wind. A tarp flapping in gusts is a sail, not a shield.
- Set up safely. Use a stable ladder, tie it off, and have a spotter on the ground.
- Clear the damage zone. Remove loose shingles and small debris so the tarp lies flat.
- Measure the opening. Add at least 4 feet of overhang on every side so runoff clears the damage.
- Cut the tarp to size. Bigger is better than smaller, but keep it manageable for one or two people.
- Drape from the top down. Start at the highest point and roll the tarp down over the damage.
- Fasten above the damage. Nail or screw through wooden boards placed along the ridge or upper edge, never through the tarp alone.
- Secure the lower edge. Add boards or weighted fasteners so wind cannot get underneath.
- Check the overlap. If you need two tarps, overlap them so the upper tarp sheds water over the lower one.
Tools and Materials You'll Need
Gather everything before you climb:
- Heavy-duty tarp, thick enough to resist wind and punctures
- Wooden boards or furring strips for fastening
- Hammer, nails, or a cap nailer
Watch out: fastening only through the tarp's grommets is the most common failure. Grommets tear out in high winds. Boards spread the load and hold.
Choosing the Right Tarp Size and Fastening Method
Tarp size and fastening should match the damage, not the other way around. A small leak needs less coverage than a full roof opening, and a ridge tear needs different anchoring than a field of missing shingles. The goal is simple: get the tarp past the damage on every side, anchor it above the damage so water runs off, and keep wind from getting under any edge.
Sizing by Damage Type
Measure the opening, then add overhang. Extend the tarp at least 4 feet past the damage on every side, and more on the downhill edge so runoff clears the wall line.
| Damage Type | Tarp Coverage | Fastening Approach |
|---|---|---|
| Small leak or cracked flashing | 4 ft overhang past the leak | Boards along upper edge, weighted lower edge |
| Missing shingles in one area | 6 ft past each side | Ridge board plus side battens |
| Large opening from debris | Cover the whole slope | Ridge board, side battens, weighted base |
| Ridge or hip damage | Wrap over the peak | Boards on both sides of the ridge |
| Valley or penetration leak | Extend past the valley centerline | Upper-edge board plus a batten on each side |
Two rules override the table. First, always extend the tarp over the ridge or hip when the damage is anywhere near the top of the roof; a tarp that stops below the peak lets water run under its upper edge. Second, if one tarp cannot cover the damage with proper overhang, use two and overlap them so the upper tarp sheds water over the lower one, never the reverse.
Fastening Without Relying on Grommets
Grommets are the weakest point on any tarp. In high wind they tear out first, and a tarp that loses its grommets becomes a sail. The fix is to spread the load: run wooden boards or furring strips along the upper edge and fasten through the board and the tarp into the decking or ridge, so the fastener holds the board and the board holds the tarp.
- Ridge wrap: place a board on each side of the peak and fasten through both, sandwiching the tarp over the ridge.
- Side battens: run boards down the edges parallel to the slope so the tarp cannot flap at the sides.
- Weighted lower edge: use sandbags or weighted fasteners along the bottom so wind cannot get underneath.
Thicker, heavier tarps resist wind and last longer. Thin plastic sheeting tears in the first gust. When in doubt, go heavier, and check the tarp from the ground after every storm.
How Long Does Roof Tarping Last?
Roof tarping is a temporary repair, and most tarps hold up for weeks, not months. A tarp is a temporary measure, not a long-term fix, and its useful life depends on how well it is installed and on the weather.
What shortens a tarp's life:
- High winds that work the fasteners loose
- Heavy rain pooling on a sagging tarp
- UV exposure breaking down thin material
Inspect the tarp after every storm. Re-secure loose boards and replace torn sections. A tarp that fails quietly is worse than no tarp, because you stop watching for leaks.
Roof Damage Insurance Claim Documentation That Gets Results
Insurance claim documentation starts the moment you notice damage, not when the adjuster arrives. Photograph everything before you cover it.
What to capture:
- Wide shots of each damaged area
- Close-ups of missing shingles, holes, and granule loss
- Photos of interior water stains and damaged belongings
Keep every tarp receipt. Temporary roof protection is often a covered expense, but only if you can prove what you spent. Our team handles insurance claim assistance every week, and the claims that go smoothly are the ones with clean photos and a clear timeline.
For more on spotting and proving storm damage, see our roofing blog.
What Roof Tarp Cost Looks Like and What Affects It
Roof tarp cost depends on the size of the damaged area, roof height and pitch, how much material is needed, and whether the work is an emergency call-out. There is no single number, and an estimate made without seeing the roof is only a guess. What you can do is understand the factors so you can read an estimate and ask the right questions.
The Factors That Move the Price
- Square footage covered. A small leak costs far less than a full slope, because material and labor scale with area.
- Roof access. Steep, tall, or cluttered roofs take more time, more gear, and sometimes a lift, all of which add labor.
- Material grade. Heavier tarps cost more but last longer; thin sheeting is cheaper and fails sooner.
What to Confirm Before You Authorize Work
A transparent emergency tarping estimate should tell you four things: the square footage being covered, the material grade, whether debris removal is included, and whether the price is a flat fee or an hourly rate plus materials. Ask for it in writing, and ask whether the tarping charge is separate from any later permanent repair.
Response Time and Service Expectations
After a major storm, demand for emergency tarping spikes and crews are stretched. When you call, ask three questions: whether the company can give you a window rather than a vague promise, whether they will document the damage with dated photos before covering it, and whether they will leave the tarp in a condition you can inspect from the ground.
Ask for the estimate in writing. If you are weighing a tarp against a permanent repair, our residential roofing services cover repairs, replacements, and free inspections.
Get a Free Estimate Before the Next Storm Hits
A tarp protects you for weeks. A real repair protects you for years. The gap between them is where homeowners lose money, because a tarp left up too long lets water find new paths in.
Do not wait for the next storm to find out what your roof needs. You can check our service areas page to see whether we serve your area. When you are ready, request a free estimate and we will walk your roof, document the damage, and give you a clear plan. You can also contact us directly if you need help right away.
The best time to fix a roof is before the next storm, not after.
Frequently Asked Questions
Is it safe to tarp a roof yourself?
Only if the roof is walkable, the pitch is low, and the weather has cleared. Wet shingles, steep slopes, and damaged decking create serious fall hazards. Most homeowners should stay off the roof and call a professional, especially if the damage involves sagging, missing decking, or downed power lines nearby. A ladder alone is not enough protection on a storm-damaged roof.
How much does emergency roof tarping cost?
Roof tarp cost depends on roof size, pitch, damage severity, and whether the work is done after hours. Emergency work can cost more than scheduled work, and pricing depends on the specifics of the job. Whether tarping is covered depends on your policy, so keep every receipt. Ask for a written estimate before work begins and confirm whether the tarp fee is separate from the permanent repair.
Will homeowners insurance cover emergency roof tarping?
Whether temporary protection is covered depends on your policy and the cause of damage, so check with your insurer. Save photos, receipts, and the contractor's invoice. Roof damage insurance claim documentation should include dated images of the damage, the tarp installation, and any interior water intrusion. Call your insurer before or immediately after tarping so the claim file reflects the emergency.
How long can a roof stay covered with a tarp?
How long a tarp lasts depends on its quality and the weather, so check it regularly and plan a permanent repair. Sun exposure, high winds, and heavy rain shorten tarp lifespan. Schedule a roof inspection and permanent repair as soon as your insurer approves the claim. Leaving a tarp past its useful life risks water intrusion and further damage.
Storm season does not wait, and neither should your roof. If you are staring at a missing shingle line or a ceiling stain, get a professional eyes on it now. Leitch Roofing offers free estimates, skilled crews, quality materials, and insurance claim assistance to take the guesswork out of the process. Get started with Leitch Roofing and protect your home before the next round of weather rolls in.